How to Black Out Something in PDF The Secure Way
Learn how to black out something in PDF files correctly. Our guide covers secure redaction with Adobe, free tools, and mobile apps to protect sensitive data.
If you need to black out something in a PDF securely, the only real answer is to use a proper redaction tool. I've seen it time and time again: someone thinks they've hidden sensitive information by just drawing a black box over it, only for that data to be easily exposed later. It’s a huge security risk. True redaction, on the other hand, makes sure that data is gone for good.
Why Covering Text Isn't the Same As Redacting It
When you need to hide something in a PDF, what's your first move? If you're like most people, you probably open up a basic editor and draw a black rectangle over the text. It looks like it's gone, so it should be safe, right?
Wrong. This is one of the most common—and most dangerous—mistakes you can make with sensitive documents.
Simply covering text only adds a new layer on top of the original content. Think of it like putting a sticky note over a word on a paper document. Anyone who gets their hands on it can just peel the note off and see what's underneath.
In the digital world of PDFs, it’s even easier. Someone can often just select the text under the box, copy it, and paste it elsewhere. Or they could use a simple PDF editor to move or delete the black box, instantly revealing the "hidden" information. The original text and images are still there, lurking in the document's data.
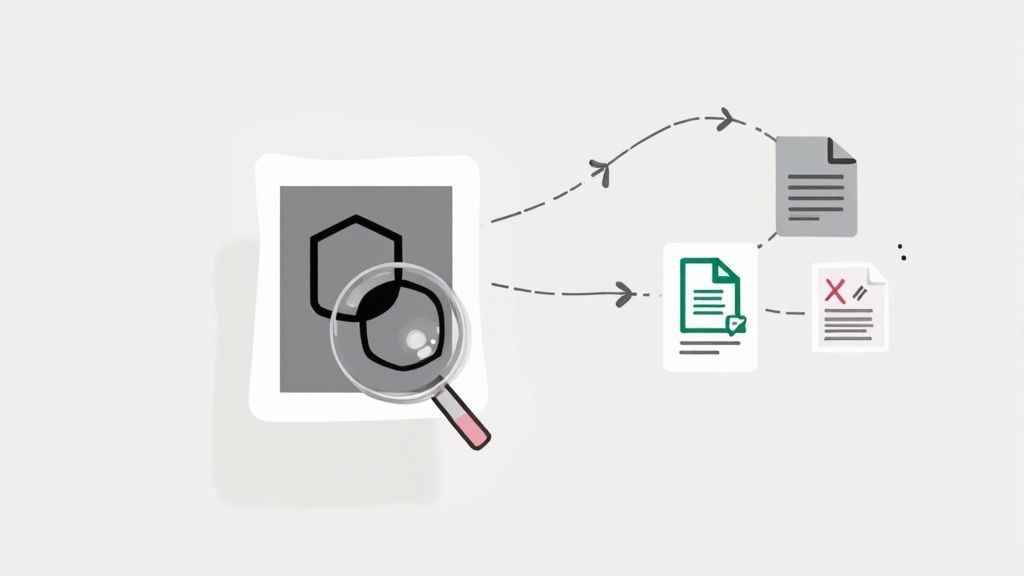
This simple flowchart shows the critical difference.
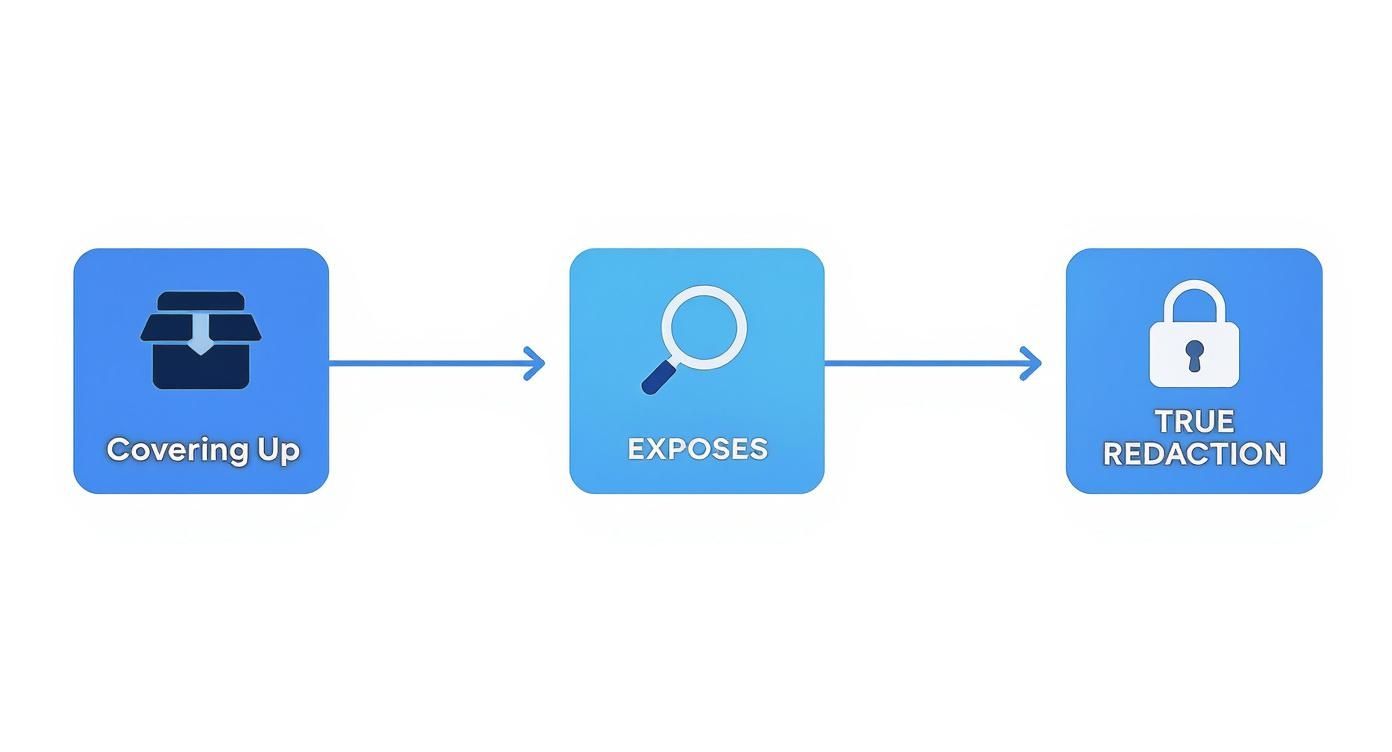
As you can see, covering something up is a recipe for exposure. Real redaction is the only way to lock it down.
True Redaction Permanently Destroys Data
Proper redaction is a destructive process. A dedicated redaction tool doesn't just slap a black box on top of your text; it goes into the file's code, finds the actual data for that text or image, and completely deletes it.
Once you redact and save the file, that information is scrubbed clean. It's unrecoverable. This is the only way to be absolutely certain that sensitive details like Social Security numbers, bank account information, or personal addresses are gone before you share a document.
It's a totally different process from adding collaborative notes, by the way. While you can learn how to insert comments in a PDF non-destructively, redaction is all about permanent removal.
The Growing Need For Secure Document Handling
This distinction is so critical that it's created a booming market for secure editing tools. As our work and lives have moved online, the need to handle digital documents safely has skyrocketed. The global PDF editor software market, valued at USD 4.69 billion in 2025, is expected to explode to USD 24.7 billion by 2035.
That incredible growth is driven by businesses scrambling to protect their confidential information, especially as remote work becomes the norm. Everyone from small businesses to massive corporations is investing in tools that can do the job right.
To help you choose, here's a quick breakdown of the common methods people try and how they stack up.
Redaction Methods At a Glance
| Method | Tool Example | Security Level | Best For |
|---|---|---|---|
| Drawing a Shape/Box | Microsoft Paint, Basic PDF Viewers | Extremely Insecure | Absolutely nothing involving sensitive data. |
| Changing Text Background | Word Processors | Very Insecure | Casual, non-sensitive obfuscation only. |
| Using Comments/Highlights | Most PDF Readers | Extremely Insecure | Annotating, not redacting. Easily removed. |
| True Redaction Tool | Adobe Acrobat Pro, Foxit PDF Editor | Highly Secure | Legal, financial, and personal documents. |
This table makes it clear: when security is on the line, there’s really only one option.
Beyond just good practice, industries often have strict rules for protecting data. For example, anyone handling credit card information must follow specific PCI compliance guidelines. Using the right tool isn’t just a smart move; it’s often a legal and regulatory requirement.
When you’re dealing with sensitive information and can’t afford a single slip-up, Adobe Acrobat Pro is the tool the pros turn to. Sure, other methods can get the job done, but Acrobat's dedicated Redact tool is built from the ground up for serious security. It doesn't just put a black box over your text; it surgically removes the underlying data, which is exactly what legal, government, and corporate teams need for compliance and peace of mind.
This kind of robust security is a big reason the PDF editor market has exploded, hitting an estimated USD 2.86 billion in 2024. The pressure from regulations like GDPR has forced a greater focus on secure data handling, and tools like Acrobat are at the forefront of that shift.
The image above gives you a peek at the Redact toolbar in Acrobat Pro. Think of it as your command center for scrubbing sensitive info. It’s a world away from simply drawing a black rectangle over text.
Getting Started with the Redact Tool
First things first, open your PDF in Adobe Acrobat Pro. Head over to the Tools center and find the Redact tool. Clicking it brings up a secondary toolbar loaded with specialized options for marking content you want to get rid of.
Notice I said "marking," not "deleting." This is a critical distinction. Acrobat uses a two-step process: you mark everything for redaction first, and only then do you apply the changes permanently. This built-in safety net lets you double-check everything before you cross the point of no return.
Using Advanced Search and Redaction
Here’s where Acrobat really shows its power. Imagine you have a 100-page contract and need to remove a client's name that appears 50 times. Hunting for each instance manually is a recipe for disaster.
This is where the Find Text or Patterns feature comes in. It’s a game-changer. With it, you can:
- Search for a specific word or phrase.
- Automatically find patterns like social security numbers, credit card numbers, or email addresses.
- Run a search for multiple different terms all at once.
Acrobat will generate a list of every match it finds. From there, you can check a box to mark every single one for redaction in one fell swoop.
My Advice: Before you commit, always use the Preview option. It shows you exactly what the final document will look like, giving you one last chance to spot anything you might have marked by mistake.
Customizing and Finalizing Your Redactions
Once your content is marked, you can even change how the redactions look. The default is a plain black box, but you can change the color or even add overlay text. For example, legal teams often add text like "Exemption 5" directly onto the redaction mark to explain why the information was removed, citing a specific statute.
The final, irreversible step is clicking Apply. Acrobat will pop up a warning, reminding you that there’s no undo button for this. Once you confirm, the software doesn't just hide the content—it scrubs it from the PDF's underlying code.
To finish, Acrobat prompts you to save the new file, usually suggesting a name like "[OriginalFileName]_Redacted.pdf" to avoid overwriting your original. It also gives you the option to remove hidden metadata—things like the author’s name or creation date—for an extra layer of security before you send that document on its way.
Free Tools That Get the Redaction Job Done
You don't always need to pay for a premium subscription to securely black out text in a PDF. While professional-grade software has its place, there are some fantastic free options out there that deliver true, permanent redaction—if you know how to use them correctly. These tools are perfect for those one-off tasks or when you're simply working on a tight budget.
Let's walk through some of the most reliable free desktop tools for both Mac and Windows. I'll show you how to ensure your sensitive information stays private without spending a penny.
Using macOS Preview the Right Way
If you’re on a Mac, you already have a powerful tool built right in: Preview. But there’s a massive catch when it comes to redaction. Just drawing a black box over text using the annotation tools is completely insecure. Anyone can simply move the box and see the text underneath.
To use Preview safely, you have to flatten the document. This trick essentially converts the PDF page into a single image, permanently burning your black box into the content.
Here’s the only correct way to do it:
- Open your PDF in Preview and grab the Rectangular Selection tool to highlight the text you need to hide.
- Head up to the menu and select Tools > Anonymize Selection. A black box will appear over your selection.
- Now for the most critical part: Go to File > Export as PDF. It’s essential that you do not use "Save" or "Save As."
- Give the file a new name, something like "Client_Contract_Redacted.pdf," and save it.
Exporting is what creates a brand-new, "flattened" file. In this new version, the black boxes are actually part of the page itself, not just a floating layer on top. This makes the original text impossible to recover.
Cross-Platform Open-Source Alternatives
For those on Windows or anyone looking for a more dedicated free tool, the open-source community has you covered. An application like PDFsam Basic is a well-known workhorse for splitting and merging PDFs, but its wider ecosystem includes modules and advanced versions with more robust editing features.
A more direct and simple option is PDF Redactor. This is a lightweight, no-frills application built for one purpose: to permanently black out text and images. The interface is dead simple—you just draw your redaction boxes and apply them, knowing the underlying data is actually being removed.
Expert Insight: The real trade-off between free and paid tools isn't usually security—it's efficiency. Free tools force you to manually hunt down and black out every single piece of information. In contrast, paid software like Acrobat Pro can search an entire 500-page document and automatically redact every instance of a social security number or a specific name in seconds.
Ultimately, your goal is to permanently destroy data, not just cover it up. While the methods might differ, these free tools can absolutely achieve the same level of security as their paid counterparts for manual, one-off redactions. Of course, proper document handling goes beyond just redaction. For students and researchers, knowing how to properly convert a PDF into organized notes can be just as crucial as hiding sensitive data before sharing your work.
Using Online Tools to Black Out Information Safely
When you’re away from your main computer and need to redact a PDF quickly, an online editor can feel like a lifesaver. They’re right there in your browser, often free, and require no installation. But this convenience comes with a significant security catch that you absolutely need to think about before uploading a sensitive file.
The whole thing boils down to a matter of trust. The moment you upload a document to a web-based service, you’re handing your data over to a third-party server. This simple act opens the door to risks, from data being intercepted during the upload to the service holding onto a copy of your file for who knows how long.
Vetting Online PDF Editors for Privacy
Before you drag and drop a file into any online tool, a quick security check is non-negotiable. Your first stop should always be the platform’s privacy policy. You're looking for clear, straightforward language—not confusing legal jargon—about how they handle your data.
A trustworthy service will be upfront about a few key things:
- Data Encryption: They should state that your files are encrypted both while being uploaded (in transit) and while stored on their servers (at rest).
- Automatic Deletion: Look for a specific timeframe for how long they keep your files. Good services often promise to automatically wipe your documents from their servers within a short window, usually just an hour or two.
- No Data Mining: You want a clear guarantee that they won't peek at, copy, or analyze your document's content for any reason.
Taking just a couple of minutes to do this due diligence can prevent a massive privacy headache down the road. For handling truly sensitive documents online, you'll also want to look for specific security certifications. It's worth learning about HIPAA-compliant platforms for secure document processing if you handle medical or other highly protected information.
Before uploading any sensitive document, run through this quick checklist. If a tool doesn't meet these basic criteria, it's best to find another one or wait until you can use a secure desktop application.
Online Redaction Tool Security Checklist
| Security Check | Why It Matters | What to Look For |
|---|---|---|
| Clear Privacy Policy | If they don't tell you how they protect your data, assume they don't. | A dedicated, easy-to-find "Privacy Policy" or "Security" page. |
| HTTPS/SSL Encryption | Ensures your file is encrypted during upload and download. | The "lock" icon and https:// in the browser's address bar. |
| Stated Deletion Policy | You need to know your file isn't sitting on their server indefinitely. | A clear statement like "Files are deleted after 1 hour." |
| No Account Required | Services that force you to sign up may be collecting your personal data. | The ability to upload, edit, and download without creating an account. |
| Server Location | Data privacy laws vary by country; where your data is stored matters. | Mention of server jurisdiction (e.g., EU, USA) if subject to regulations like GDPR. |
A tool that ticks all these boxes is a much safer bet, but remember that no online service is ever completely risk-free.
A Quick Guide to Safe Online Redaction
Thankfully, many online editors have made secure redaction incredibly simple. They know there's a huge demand for it. The scale is pretty mind-boggling; some platforms report processing over 100 million PDFs weekly, making redaction a critical feature for protecting both personal and business data. You can find more PDF usage trends at pdfreaderpro.com.
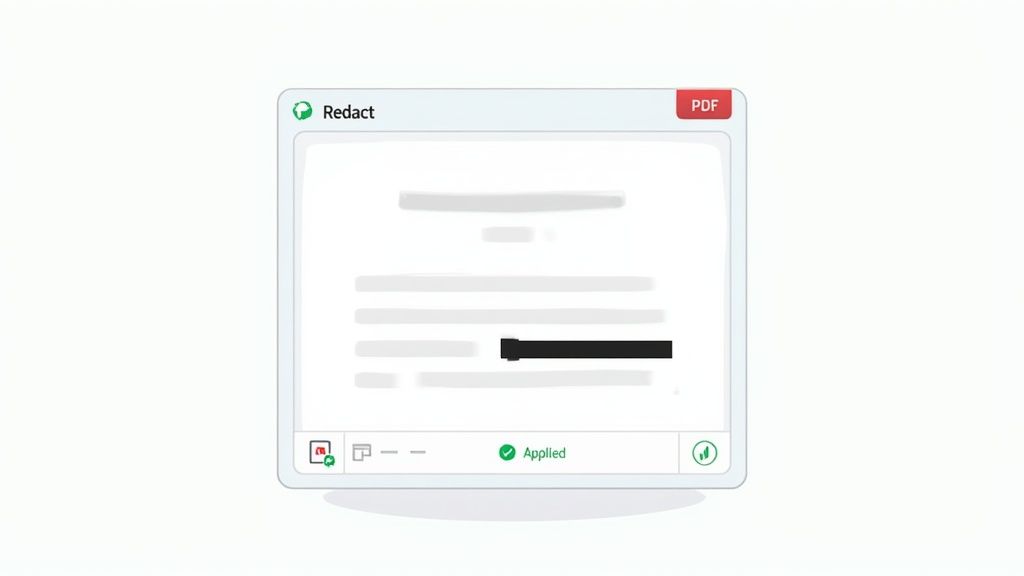
Here’s what a typical online editor with a redaction tool looks like—clean, simple, and built for speed.
The design is intentionally straightforward. You upload your file, find the redaction tool (it usually looks like a black marker or a solid rectangle icon), and then just draw boxes over the text or images you need to hide.
After you’ve marked everything, you’ll apply the changes and download your newly redacted PDF. But don’t stop there. The final, crucial step is to look for a "Delete File" button on the website and click it. Manually deleting the file from their servers right away is always the best practice.
My Personal Rule: I never, ever upload highly sensitive documents to a free online editor. Think financial statements, medical records, or signed legal contracts. The risk just isn't worth the convenience. For that kind of material, I stick exclusively to secure, offline desktop software where I have 100% control over the file from start to finish.
How to Verify Your Redaction Is Permanent
You've gone through the motions and blacked out all the sensitive bits. So, you're ready to hit send, right? Not so fast.
The final, and arguably most critical, step is to make sure those redactions actually stuck. You have to actively try to break your own work. Trusting the software isn't enough when a data leak is on the line.
This last check is your peace of mind. A few simple tests can tell you in seconds whether that confidential info is gone for good or just hiding behind a flimsy black box.
Simple Verification Checks You Must Perform
Let's start with the basics. These quick checks mimic the first things someone would try if they wanted to see what's underneath those black bars. You'd be surprised how often these simple methods expose a bad redaction job.
- The Copy-and-Paste Test: This is the classic test. Drag your cursor over the redacted area, selecting the black box and some of the text around it. Copy it (Ctrl+C or Command+C) and then paste it into a plain text editor like Notepad or TextEdit. If any of the "hidden" text shows up, the redaction is a complete failure.
- The Search Function Test: Open the PDF's search bar (Ctrl+F or Command+F) and type in a specific word or number you know is under one of your redactions. If the search tool finds and highlights that blacked-out area, it means the text is still there, just invisible.
Takeaway: If your document fails either of these tests, stop immediately. Do not share it. You need to go back to the original file and use a proper redaction tool that permanently removes the data instead of just covering it up.
A Deeper Dive for Total Confidence
When dealing with highly sensitive documents where there is zero room for error, you need to go one step further for absolute certainty. This involves peeking under the hood at the PDF’s raw content.
Find your redacted PDF file and open it with a very basic text editor—Notepad on Windows or TextEdit on Mac will do the trick.
You'll be greeted by a wall of code, but don't get overwhelmed. All you need to do is use the editor's search function and look for the sensitive data you thought you removed. If you find any trace of that text within the code, it means it was never truly deleted from the file.
A securely redacted document will have absolutely no record of the original data in its source code. This verification step is a crucial part of any secure document workflow. It’s just as important as knowing how to organize research papers or managing any other kind of sensitive information. A final check ensures what's gone is really gone.
Common Questions About Blacking Out PDFs
Even with the right tools, redacting a PDF can feel a bit nerve-wracking. A simple mistake could accidentally expose sensitive information, and nobody wants that. To help you get it right every single time, let’s tackle some of the most common questions and points of confusion I hear from people.
We'll clear up the gray areas so you can redact your documents with total confidence.
Can I Just Draw a Black Box Over the Text?
This is a hard no. I can't stress this enough: just covering text with a black shape is the single most common and dangerous mistake people make.
When you use a drawing tool or a marker, you’re just adding another layer on top of the original text. The sensitive information is still sitting right there, underneath that box, fully intact in the file’s code. Anyone can simply click on the box, delete it, and see what you tried to hide. I've seen it happen.
Proper redaction isn't about hiding; it's about permanently deleting the data. You absolutely must use a dedicated redaction tool to scrub the information from the file for good.
What Happens If I Undo a Redaction After Saving?
If you’ve used a true redaction tool and hit "Save," that's it. The change is permanent and there’s no going back. The data hasn’t just been hidden—it’s been completely removed from the document's structure. This is the entire point of secure redaction.
Critical Best Practice: I tell everyone this: always work on a copy of your original document. Before you redact anything, save a duplicate. Name your final version something clear, like "Contract_Redacted.pdf." This way, you'll always have the untouched original to fall back on if you make a mistake.
Are Online Redaction Tools Actually Safe?
The answer is a cautious "it depends." For something non-critical, like blacking out a price on an invoice for a friend, a reputable online tool with a transparent privacy policy is probably okay. Just make sure the site uses HTTPS and clearly states that they delete your files from their servers quickly.
However, if you're dealing with anything truly sensitive—legal contracts, financial statements, medical records—my strong advice is to stick with offline desktop software. Using a desktop app means your data never leaves your computer, eliminating the risk of it being intercepted or stored on a server you have no control over.
How to Handle Password-Protected PDFs
You generally can't redact a password-protected PDF directly. Most redaction tools need full access to the file's content to permanently alter it, and the security restrictions get in the way.
Here’s the right way to handle it:
- First, open the PDF using the required password.
- Save a new, unprotected copy of the document.
- Now, perform all your redactions on this unprotected copy.
- Once you're finished, save the final, redacted file.
If the final document also needs to be secure, you can add a new password after the redaction is complete. This gives you a file that is both properly redacted and access-controlled.
Finding every instance of a name or account number in a massive document can be a nightmare. PDF Summarizer is a tool that uses AI to make this process much easier. You can literally ask your document where to find specific information, and it will give you instant answers with clickable sources. It can make your review and redaction prep work a whole lot faster. You can give it a try for free at https://pdfsummarizer.pro.
Recent articles

Learn how to merge pdf foxit reader PDFs quickly with step-by-step tips, free options, and 2026 updates.

Learn how to open pdf in google docs across devices, fix formatting, and edit PDFs with ease.

Discover the 12 best document collaboration tools for any team. Compare features, pricing, and use cases to find the perfect platform for your workflow.

Learn how to add citations in Google Docs using the built-in tool, add-ons like Zotero, and an advanced PDF workflow. Master APA, MLA, and Chicago styles.

Discover the best citation management software for your research. Compare Zotero, EndNote, Mendeley, and more to find the perfect tool for your workflow.

Explore critical thinking skills for students with practical strategies to analyze information, argue persuasively, and boost academic success.