How to Fill PDF Forms on Mac A Practical Guide
Tired of printing forms? Learn how to fill PDF forms on Mac using Preview, Adobe, and other top tools. Get expert tips for signing and saving your documents.
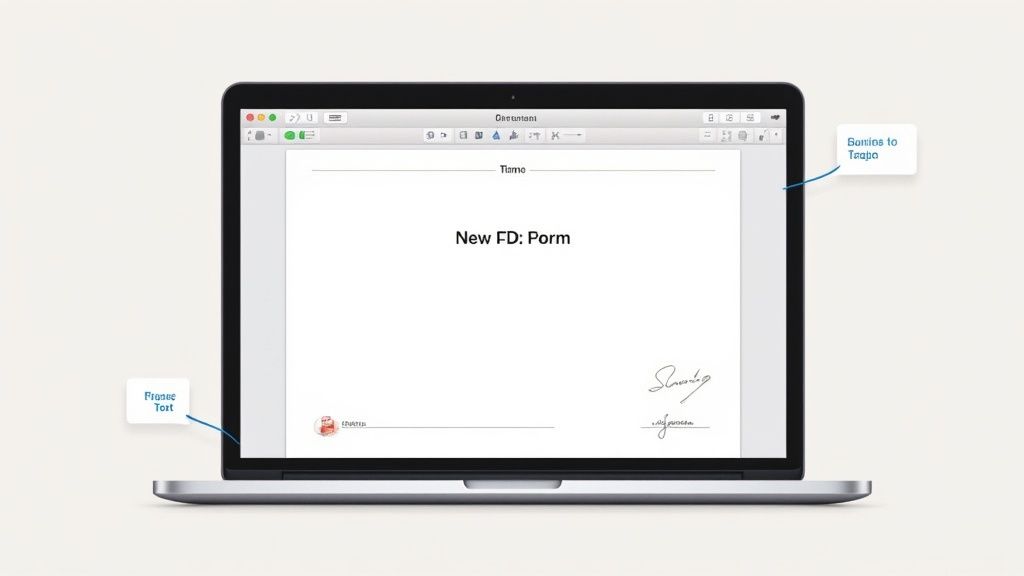
The fastest way to fill out a PDF form on a Mac is to use the app that's already there: Preview. Just open the document, click the "Show Markup Toolbar" button (it looks like a little pen tip), and start typing. It works surprisingly well for most forms, even those that aren't technically "fillable."
Your Go-To Methods for Filling PDF Forms on a Mac
So you've got a PDF form to fill out on your Mac and you're not sure where to start. It's a common hurdle, but thankfully, you have a few excellent options built right in or available for free. The best choice really just depends on what kind of form you're working with.
For most of the forms you'll encounter day-to-day—think simple registration forms, permission slips, or basic applications—your Mac is already equipped to handle them. We'll walk through the most common and effective methods:
- Apple's Preview App: This is your first stop. It's the default, built-in tool that handles basic form-filling and signing with zero fuss.
- Adobe Acrobat Reader DC: The free, industry-standard tool from the creators of the PDF. It's the perfect choice for more complex or official documents that have special interactive features, like fields that do calculations.
- Online PDF Fillers: These web-based tools are a great backup. They're handy when you're not on your own computer or just need to make a quick edit without downloading any software.
This flowchart gives you a simple way to decide which tool to grab based on how complex your form is.

My rule of thumb? Always start with Preview. Only reach for something else if you hit a snag or the form demands it.
Why Choosing the Right Tool Matters
Knowing how to fill out a PDF on a Mac goes beyond just typing text into boxes. It’s about making sure your information saves correctly, looks professional, and stays secure. In fact, modern Mac tools have made this process so efficient that they've cut down form-filling time by up to 80% compared to older methods.
This is a big deal, especially considering that over 35% of businesses in North America rely on Macs to handle millions of forms every year. You can get more insights on the PDF software market and how it has evolved.
Once you know the strengths of each tool, you can turn what feels like a chore into a quick, two-minute task. The goal is to get your forms filled out accurately and sent on their way, minus the tech headaches.
To make the choice even clearer, here’s a quick rundown of your options.
Which Mac PDF Form Tool Should You Use?
This table provides a quick comparison of the most common methods for filling PDF forms on a Mac, helping you choose the right tool based on your needs.
| Tool | Best For | Cost | Key Feature |
|---|---|---|---|
| Apple Preview | Everyday forms, quick signatures, and basic text entry on simple PDFs. | Free (Built-in) | Seamless integration with macOS and iCloud for easy saving and access. |
| Adobe Acrobat Reader DC | Official or complex interactive forms with scripts, calculations, and dropdowns. | Free | The gold standard for compatibility; ensures all form features work as intended. |
| Online PDF Fillers | One-off situations, collaborating, or when you're away from your own Mac. | Free (with limits) | No installation required; accessible from any web browser. |
Ultimately, having these different tools at your disposal means you're prepared for any kind of PDF that comes your way, from the simplest questionnaire to the most complex government form.
Using the Built-In Preview App Like a Pro
Every Mac comes with a powerhouse tool that most people overlook: Preview. It’s often mistaken for a simple image viewer, but it's surprisingly capable when it comes to filling out PDF forms. In many cases, it’s all you’ll ever need.
Whether you're dealing with a modern, interactive form with clickable fields or an old-school "flat" PDF that's basically just a scanned image, Preview has you covered. Once you know your way around, you can tackle just about any form that lands in your inbox without having to hunt for other software.
Firing Up the Markup Toolbar
The secret to unlocking all of Preview's editing power is the Markup Toolbar. If it's not visible when you open a PDF, just look for the icon that looks like a pen tip in a circle, usually sitting next to the search bar. One click, and a whole new set of tools appears.
For interactive forms, you'll see that the fillable fields are usually highlighted in a faint blue or gray. This is Preview's way of telling you, "Hey, you can type here!" It's pretty smart about recognizing these fields automatically.
But what about those flat, non-interactive forms? That's where the Text tool comes in. It's the button with an "A" inside a box. Clicking it drops a fresh text box onto the page, which you can drag and drop anywhere you need it. It’s the perfect way to add your name, address, or any other details onto static lines.
Tackling Signatures and Checkboxes
Adding a signature is probably one of the most common tasks, and Preview makes it a breeze. You’ve got a few great options.
- Sign on Your Trackpad: In the Markup toolbar, find the Sign icon. From there, you can create a new signature just by signing your name on your Mac's trackpad.
- Use Your iPhone or iPad: For a more natural feel, you can use a connected iPhone or iPad as a signing pad. A blank canvas will pop up on your device, letting you sign with your finger or an Apple Pencil. It’s incredibly accurate.
- Scan with Your Camera: The old-school method, digitized. Just sign a clean white piece of paper, hold it up to your Mac’s camera, and Preview will turn it into a crisp, reusable digital signature.
Once you have a signature saved, you can just click to place it anywhere on the form. And for those pesky checkboxes that aren't clickable? No problem. Just use the Text tool to type an "X" or a checkmark symbol (✓), then shrink it and drag it right into the box.
Pro Tip: Want your added text to blend in? After adding a text box, click the "Aa" stylizing icon in the Markup toolbar. This opens up options to change the font, size, and color, so you can match the existing text on the form perfectly.
Saving Your Work the Right Way
This is a critical step that a lot of people get wrong. If you just hit Save (Command + S), you’re saving the PDF with the form fields still "live." This means the person you send it to could potentially edit your entries, and it can sometimes lead to compatibility problems where your text doesn't show up at all.
To lock everything in place, you need to "flatten" the PDF by exporting it.
- Go to the menu bar and select File > Export... (make sure you don't choose "Save As...").
- A dialog box will appear. Pick a name and a place to save the new file.
- Double-check that the Format is set to PDF.
- Click Save.
This little trick creates a brand-new version of the document. In this version, your typed text, signature, and checkmarks are no longer separate elements but are baked into the document itself, like an image. It guarantees that the recipient sees exactly what you sent, and it keeps your information secure. It’s the safest way to finalize and submit any form.
When You Need Adobe Acrobat Reader on Your Mac
While Apple’s built-in Preview app is a fantastic multitool for most everyday forms, some documents are just a different breed. This is where the free, industry-standard Adobe Acrobat Reader steps in, becoming an essential part of any Mac user's toolkit. Since it's made by the same people who invented the PDF, it has the final say on compatibility.
Think of it this way: Preview is your trusty Swiss Army knife, perfect for a wide range of tasks. Acrobat, on the other hand, is the specialized instrument you pull out when precision is everything. If a form has fancy interactive features that go beyond simple text boxes, Acrobat is often the only way to guarantee it all works correctly.
Handling Complex and Dynamic Forms
Some PDFs are more like mini-applications than static documents, containing advanced logic that Preview just wasn't built to handle. These are the moments you’ll want to open the form directly in Acrobat Reader.
You'll know it's time to make the switch if you run into any of these:
- Automatic Calculations: Ever filled out an expense report that’s supposed to total your columns on the fly? Those scripts won't run in Preview. Acrobat, however, executes them perfectly.
- Complex Field Validation: Some forms are picky. They need a date in a specific format or a phone number with the right number of digits and will flag an error if you get it wrong. This validation logic often breaks in other apps.
- Specific Font Requirements: Official government or legal forms sometimes require embedded fonts to maintain their integrity. Acrobat ensures these fonts are used correctly, so the final document looks exactly as it should.
Preview has been a free tool on macOS since 2005 and is incredibly useful for simple jobs, but it can fall short with this kind of advanced logic. This can lead to some serious headaches, especially when you're dealing with important documents. For a deeper dive into how different tools stack up, these insights on PDF editor performance are worth a read.
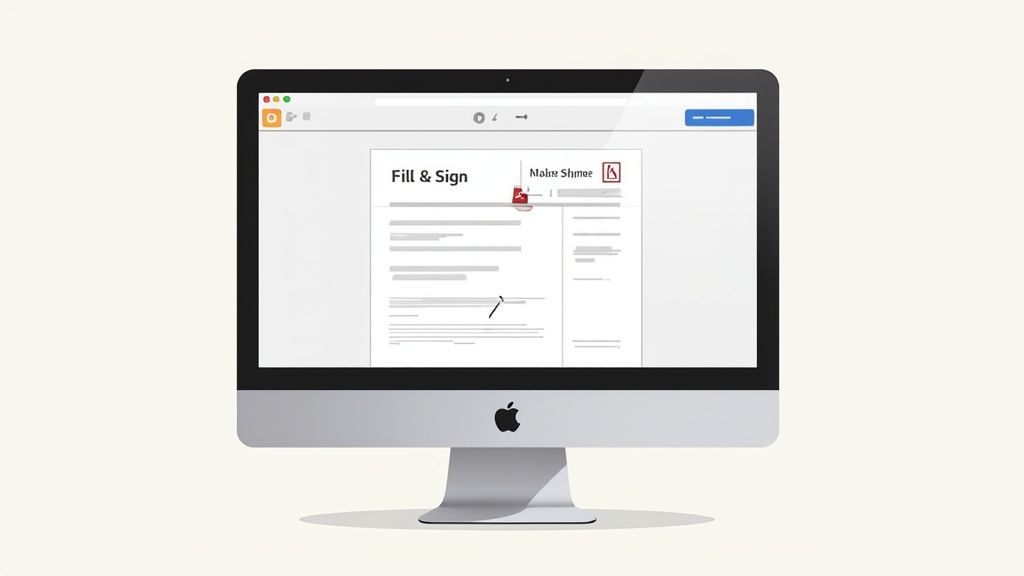
Using the Fill and Sign Feature
One of Acrobat's best features is its dedicated ‘Fill & Sign’ tool. It simplifies the entire process with a clean, straightforward interface designed to get forms done quickly. Open a PDF, and Acrobat will often detect the form fields for you, making it incredibly intuitive.
Using Adobe Acrobat Reader for official documents like tax returns, legal contracts, or intricate financial applications isn't just a suggestion—it's a best practice. It eliminates the risk of submitting a form with broken calculations or missing data, ensuring your submission is accepted without issue.
Just click on a field and start typing. Even if you get a "flat" PDF with no interactive fields, this tool lets you manually add text boxes, checkmarks, and your signature right where they need to go. It makes the entire process smoother, especially when you’re working on something where accuracy is non-negotiable. When you absolutely can't afford a mistake, Acrobat is your most reliable bet.
Exploring Other PDF Apps and Online Fillers
While Preview and Adobe Reader are fantastic go-to options, sometimes you need a little more muscle or a different kind of tool. That’s where the world of third-party PDF apps and online fillers comes in. These alternatives are perfect when you hit a wall with the built-in tools, need specialized features, or just want a quick solution without installing anything.
If you’re constantly wrestling with PDFs, a dedicated app like PDF Expert might be exactly what you need. It’s a favorite among Mac users for its slick interface and incredibly smart form-filling. I've found it's particularly good at detecting form fields on tricky, scanned documents where other apps might struggle, which can be a huge time-saver.
Dedicated Desktop Apps for Mac
For those whose work goes beyond just filling out forms—think editing text, reordering pages, or leaving detailed feedback—a premium desktop app is a game-changer. These tools roll form-filling into a complete PDF editing suite, turning your Mac into a document powerhouse.
Imagine you're collaborating on a team proposal. You need to fill in your part, but you also spot a section your colleague wrote that needs a tweak. A powerful app lets you do both: complete the form and drop in a comment or an annotation right where it's needed. We actually have a great guide on how to insert comments in a PDF that dives deeper into this.
Some of these advanced tools are now integrating AI to handle complex tasks. For example, Instafill.ai is designed for high-volume work, promising 99-100% accuracy for batch fills and handling conditional logic across multiple languages. This is a big deal for businesses in compliance-heavy industries. The PDF software market is definitely heating up with these kinds of innovations.
The Convenience of Online PDF Fillers
On the flip side, sometimes you just need to fill out a single form and move on. This is where web-based tools like Smallpdf or Sejda shine. You can upload your PDF, fill it out right in your browser, and download the completed version in minutes. They’re lifesavers when you’re working on a computer that isn't yours or just don't want to install another app.
But there's a catch: privacy.
When you use a web-based PDF filler, you're uploading your document to someone else's server. For anything containing sensitive information—think financial records, medical forms, or legal contracts—it's always safer to stick with an offline desktop app like Preview or Adobe Reader.
I generally reserve online tools for non-sensitive documents, like a simple event registration or a basic survey. It's always a good habit to glance at a site's privacy policy before you upload anything personal.
Feature Comparison: Third-Party PDF Tools for Mac
Choosing an external tool really boils down to your specific needs—convenience, power, or security. Here's a quick look at some popular third-party and online options to help you decide which is the right fit.
| Tool Name | Type | Key Advantage | Potential Drawback |
|---|---|---|---|
| PDF Expert | Desktop App | Advanced editing features and excellent form detection | Paid software (often a subscription) |
| Smallpdf | Online Tool | Super convenient and accessible from any browser | Security concerns with sensitive documents |
| Sejda | Online Tool | Generous free tier with a wide range of editing tools | Daily usage limits on the free plan |
Ultimately, having one of these tools in your back pocket gives you more flexibility to handle any PDF that comes your way, no matter how complex or simple the task.
Solving Common PDF Form Frustrations on a Mac

Even with the best tools, you’ll inevitably hit a snag with a PDF form on your Mac. You click a field and… nothing. Or you spend twenty minutes carefully entering your information, only for the recipient to see a blank document. These moments are frustrating, but most of these common headaches have pretty straightforward fixes.
More often than not, the problem lies with the PDF itself. If you're dealing with a "flat" PDF, it's basically just a picture of a form. It has no interactive fields to click on. In this case, Preview’s Markup toolbar is your go-to solution for adding text boxes right over the lines where you need to type.
When You Can't Type in Form Fields
The classic issue: you see a line or a box, but you can’t type in it. If you know the form is supposed to be interactive, the fields might just be incompatible with Preview. This is a perfect time to try opening it in the free Adobe Acrobat Reader, which is built to handle even the most complex and finicky forms.
Another culprit could be document security. Some PDF creators intentionally lock their forms to prevent anyone from making changes. While this can feel like a dead end, you can often learn more about how to edit a read-only PDF. Just remember these protections are usually there for a reason, so be mindful.
Making Sure Your Entered Text Is Saved
This one is maddening. You fill out a long form, save it, email it, and get a reply saying, "It's blank." This usually happens because your information is still sitting in live form fields, and the recipient's software can't read them. The data needs to be "flattened" so it becomes a permanent part of the document.
The most reliable fix for this is what I call the "Print to PDF" trick. Instead of just hitting save, go to File > Print. In the dialog box that pops up, look for the little PDF dropdown menu (usually in the bottom-left corner) and choose Save as PDF. This creates a brand new, non-interactive PDF with all your text baked right in. It's a game-changer.
Once you’ve finally got your form filled and properly saved, the last hurdle can be printing it. If your Mac insists the printer is offline when it’s clearly on, you’ll probably need to troubleshoot printer offline issues on Mac. Getting past these little technical glitches is often the final step to getting your document where it needs to go.
Got Questions About Filling Out PDFs on Your Mac?
Even with the best tools, you're bound to run into a PDF that just doesn't want to cooperate. It happens to all of us. You think you're minutes away from being done, and suddenly a form field won't work or you can't figure out how to lock in your changes.
Here are some quick answers to the most common snags people hit when dealing with PDF forms on a Mac.
Why Can't I Type Into a PDF Form on My Mac?
This is probably the most frequent frustration I hear about, and it usually boils down to one of two things.
First, you might be looking at a “flat” PDF. Think of it as just a picture of a form. There are no interactive fields built into it, so there's nowhere to type. The easy fix is to use the Markup toolbar in Preview or Adobe Reader. Just click the "Text" tool and draw your own text boxes right over the lines where you need to type.
The other possibility is that the PDF is locked. The person who created it may have added security restrictions to prevent changes. If it's password-protected and you don't have the password, those form fields are off-limits.
How Do I Add My Signature to a PDF Form on a Mac?
Preview, the app that comes with your Mac, makes this a breeze. Open the PDF, click the Markup icon (it looks like a pen tip in a circle), and find the Sign icon. From there, you have a few ways to create your signature:
- Trackpad: Just sign your name directly on your Mac’s trackpad. It takes a little practice, but it's fast.
- Camera: Sign a piece of white paper, hold it up to your Mac's camera, and Preview will digitize it for you.
- iPhone/iPad: Use your phone or tablet as a signing pad. This usually gives the most natural-looking result.
Once you’ve created a signature, it's saved for future use. Just click it to drop it into any document. Adobe Reader's "Fill & Sign" feature works in a very similar way and is just as straightforward.
How Can I Save a Filled PDF So No One Can Change It?
Once you’ve filled everything out, you’ll want to "flatten" the PDF to make your entries permanent. This merges your typed text and signature into the document itself, so they can't be easily edited or deleted. It’s a crucial step before emailing sensitive forms.
The slickest way to do this on a Mac is by using the print command.
Go to File > Print. In the print dialog box that pops up, ignore the printer settings and look for the "PDF" dropdown menu in the bottom-left corner. Click it and select "Save as PDF." This creates a brand new, flattened copy of your file, with all your information securely locked in.
After you've filled out your forms, keeping them safe is the next step. It's always a good idea to get familiar with backing up your important Mac files to avoid losing critical information.
Can I Fill Out a PDF on My iPhone and Finish on My Mac?
You bet. This is where using iCloud Drive really shines. Save the PDF to your iCloud Drive folder on either device. You can start filling it out on your Mac, then open the exact same file on your iPhone to add a signature while you're on the go.
The changes sync automatically. As long as you're logged into the same Apple ID, your edits will appear on all your devices, letting you pick up right where you left off. It's incredibly convenient. For documents needing more than just filled fields, like redacting sensitive info, you might want to learn how to black out something in a PDF.
Feeling overwhelmed by dense PDFs and long reports? PDF Summarizer uses AI to help you understand any document in seconds. Upload your file, chat with it, and get instant summaries and answers with sources. It's the perfect tool for students, researchers, and professionals who need to get to the point, fast. Try it for free at PDF Summarizer and transform your documents into actionable insights.
Recent articles

Learn how to merge pdf foxit reader PDFs quickly with step-by-step tips, free options, and 2026 updates.

Learn how to open pdf in google docs across devices, fix formatting, and edit PDFs with ease.

Discover the 12 best document collaboration tools for any team. Compare features, pricing, and use cases to find the perfect platform for your workflow.

Learn how to add citations in Google Docs using the built-in tool, add-ons like Zotero, and an advanced PDF workflow. Master APA, MLA, and Chicago styles.

Discover the best citation management software for your research. Compare Zotero, EndNote, Mendeley, and more to find the perfect tool for your workflow.

Explore critical thinking skills for students with practical strategies to analyze information, argue persuasively, and boost academic success.